A landing page is a great tool for converting visitors into customers. You know that you need to use more of them, so you can control the user journey.
Let me ask you below questions.
- Do you already have a WordPress website?
- Would you like to be able to use the powerful features of a dedicated landing page tool?
- Do you want to create high-converting landing pages for your WordPress website?
- Would you prefer to publish the landing pages on your WordPress website as compared to publishing them on a subdomain?
While you can create a landing page on a standalone domain or subdomain (e.g. landingpage.digitalpurview.com), chances are you would prefer to publish it on your main domain (e.g. digitalpurview.com/landingpage) where your WordPress site is hosted.
The benefits of this approach are clear. Created this way, the landing page
- looks natural extension of your website.
- reflects and enhances your brand.
The problem is that the WordPress editor is not a great solution for creating landing pages. We will look at the solution to this problem and see how you can create a great-looking landing page, while still being able to publish as a WordPress page.
So, what is the solution?
Before we get into details, this is a high-level summary of the solution.
- Publish your landing page using a landing page tool.
- Link the landing page tool to your WordPress website and push your landing page to WordPress using a plugin.
- Publish the page on WordPress as a WordPress page (e.g. digitalpurview.com/landingpage)
Step-by-Step Process of Creating a Landing Page for WordPress
Let’s elaborate on this process in detail.
Step 1 – You need to have a high-converting landing page. We have already covered this process. So, please go thru this tutorial for creating a landing page.
Step 2 – Once you have created a landing page, you need to publish it to your WordPress website. To do that, choose the landing page and click publish.
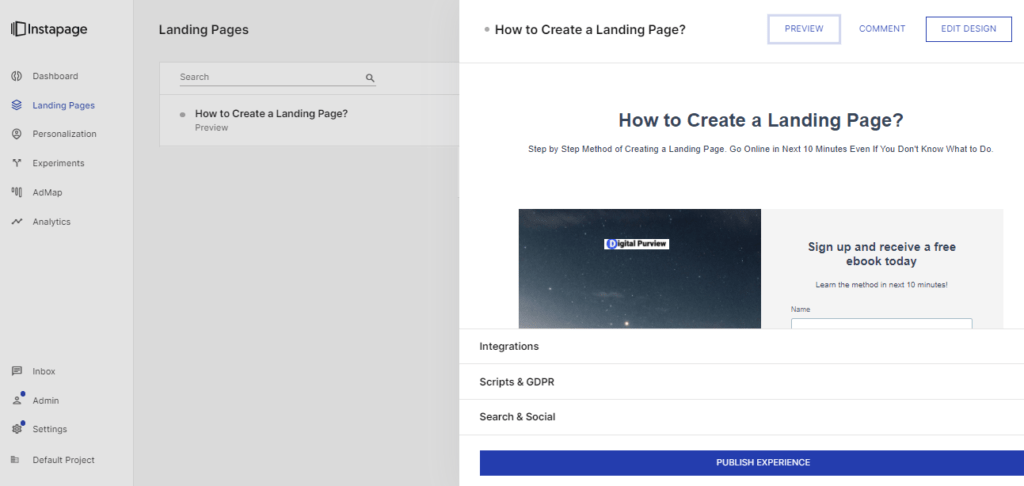
Step 3 – You will be presented with different options to publish your landing page. You can publish it on a custom domain (or subdomain), WordPress, Drupal, or Instapage domain.
We want to publish the landing page on WordPress. So. choose WordPress.

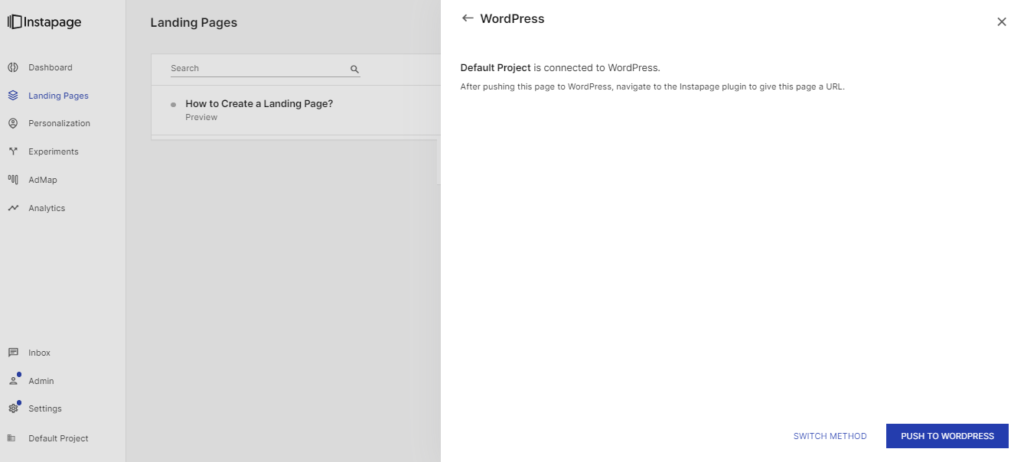
Step 4 – Click Publish to push the page to WordPress.
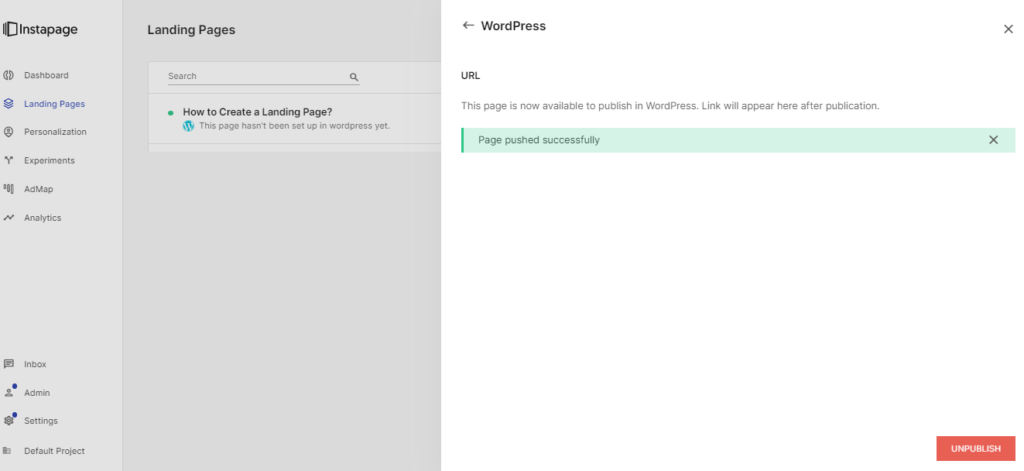
Step 5 – If your page is published to WordPress, you should receive the success message below.
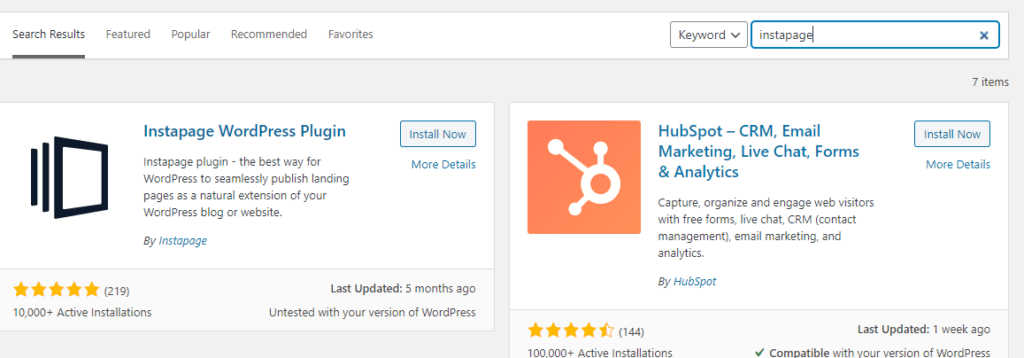
Step 6 – Now, go to your WordPress dashboard and install and activate the Instapage WordPress plugin.
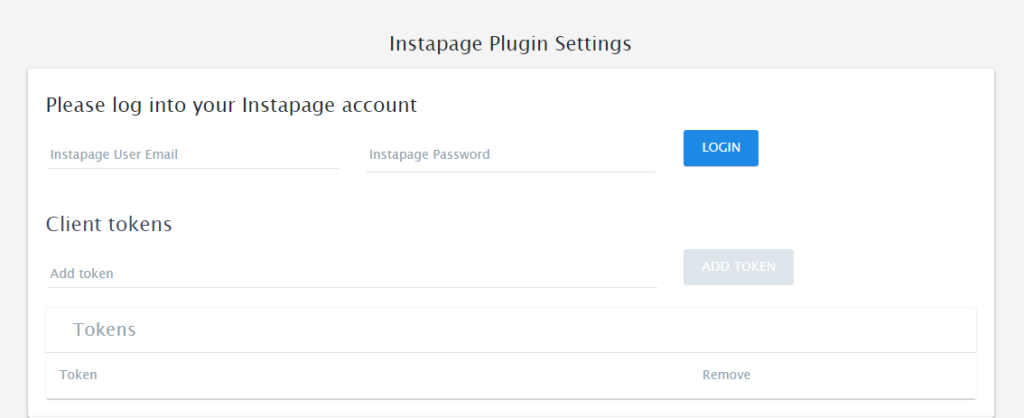
Step 7 – Once activated, you need to link your Instapage account with the WordPress website. To achieve that, go to the settings tab and enter login and connection details.
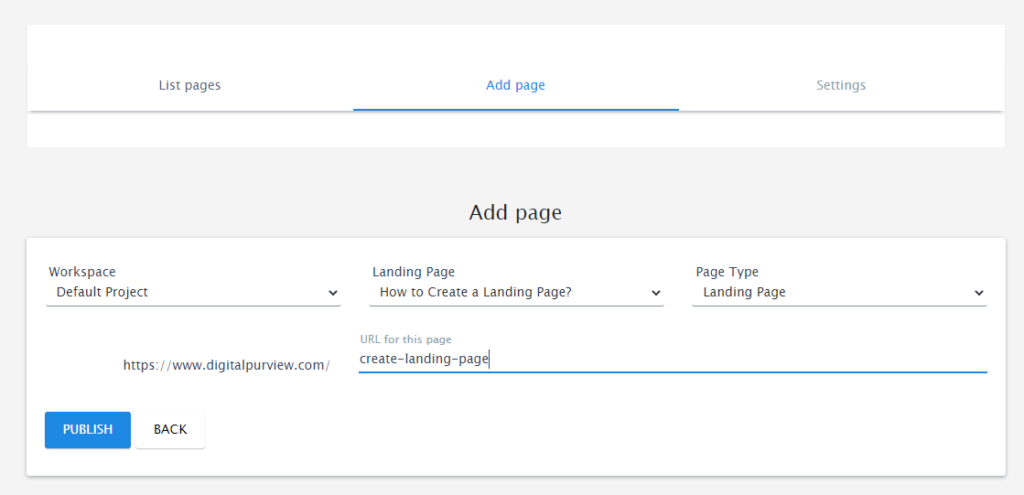
Step 8 – Now, come to add page tab, select the landing page, enter the URL, and publish.
That’s all. Now your landing page is hosted in Instapage but it is published as an extension of your site.
That way, you can use all the powerful features such as A/B testing and heatmaps, while keeping the landing pages on your main website. In short, you can create high-converting landing pages for your WordPress website, and publish them as WordPress pages.
